上一篇文章《基于OpenVNO部署YOLOv5-seg实时实例分割模型》 介绍了基于OpenVINO Python API部署YOLOv5-Seg实例分割模型,本文介绍基于OpenVINO C++ API部署YOLOv5-Seg实例分割模型,主要步骤有:
- 配置OpenVINO C++开发环境
- 下载并转换YOLOv5-Seg预训练模型
- 使用OpenVINO Runtime C++ API编写推理程序
下面,本文将依次详述。
第一步,配置OpenVINO C++开发环境,请参考《在Windows中基于Visual Studio配置OpenVINO C++开发环境》
第二步,参考《基于OpenVNO部署YOLOv5-seg实时实例分割模型》 克隆YOLOv5 Github 代码仓到本地,然后运行命令获得 yolov5s-seg ONNX 格式模型:yolov5s-seg.onnx:
python export.py –weights yolov5s-seg.pt –include onnx
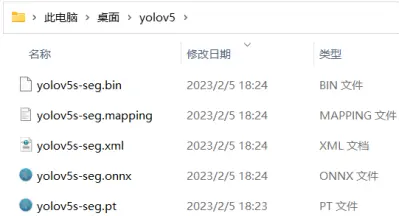
接着运行命令获得yolov5s-seg IR格式模型:yolov5s-seg.xml和yolov5s-seg.bin,如下图所示
mo -m yolov5s-seg.onnx –compress_to_fp16

yolov5-seg ONNX格式和IR格式模型
第三步:使用OpenVINO Runtime C++ API编写推理程序。一个端到端的AI推理程序,主要包含五个典型的处理流程:
- 采集图像&图像解码
- 图像数据预处理
- AI推理计算
- 对推理结果进行后处理
- 将处理后的结果集成到业务流程

image.png
基于OpenVINO Runtime C++API的同步推理代码的关键片段如下所示:
int main(int argc, char* argv[]) {
    // -------- Get OpenVINO runtime version --------
    std::cout  paddings(3);       //scale, half_h, half_w
    cv::Mat resized_img = letterbox(img, paddings); //resize to (640,640) by letterbox
    // BGR->RGB, u8(0-255)->f32(0.0-1.0), HWC->NCHW
    cv::Mat blob = cv::dnn::blobFromImage(resized_img, 1 / 255.0, cv::Size(640, 640), cv::Scalar(0, 0, 0), true);

    // -------- Step 5. Feed the blob into the input node of YOLOv5 -------
    // Get input port for model with one input
    auto input_port = compiled_model.input();
    // Create tensor from external memory
    ov::Tensor input_tensor(input_port.get_element_type(), input_port.get_shape(), blob.ptr(0));
    // Set input tensor for model with one input
    infer_request.set_input_tensor(input_tensor);

    // -------- Step 6. Start inference --------
    infer_request.infer();

    // -------- Step 7. Get the inference result --------
    auto detect = infer_request.get_output_tensor(0);
    auto detect_shape = detect.get_shape();
    std::cout  32 x 25600
    cv::Mat proto_buffer(proto_shape[1], proto_shape[2] * proto_shape[3], CV_32F, proto.data());

    // -------- Step 8. Post-process the inference result -----------
   ...
}
完整范例代码:https://gitee.com/ppov-nuc/yolov5_infer/blob/main/yolov5seg_openvino_dGPU.cpp
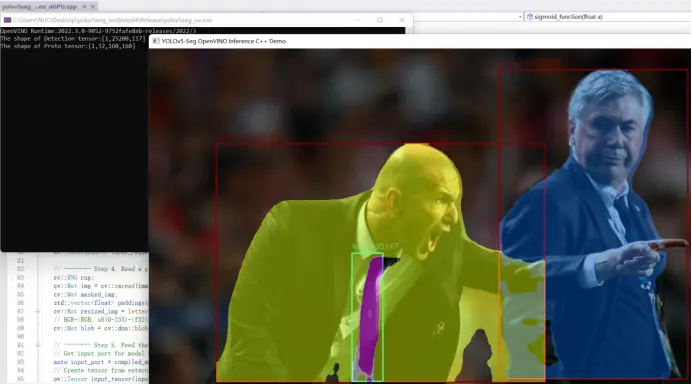
运行结果如下:

yolov5seg_openvino_dGPU.cpp运行结果